- November 26, 2019
- Posted by: fyber
- Category: Web Hosting
Many clouds hosting services are available today In IT industries like Google cloud hosting and Azure Cloud hosting. Similar to Google and Azure, Amazon has developed its cloud hosting platform known as Amazon Web Services(AWS). Amazon AWS gives various services under Aws services. One of its services is Amazon Lightsail which we have discussed in our previous blog. And now we are going to discuss its another service, called Amazon ec2 service.
Before AWS EC2, When we purchase any hosting plan we had to pay a monthly charge for every service whether we are using those services or not. But the best part of AWS EC2 is, you have to pay what you are going to use. It will decrease your workload let’s see how…
Before going in-depth into our topic first we should know what exactly is Amazon EC2.
What is Amazon EC2?
Amazon EC2(Amazon Elastic Cloud) provides us expandable computing space in the AWS cloud services. To understand this line you should think like us: Suppose you have purchased a personal Computer wherein harddisk capacity is 200Gb. And you have started installing many applications and videos and games.
But nearly a situation will appear that you will not have sufficient storage to store any data. Then you will need to purchase another hard disk to extend the previous hard disk. What if you have a hard disk that will never end?
Now You will think that, is it possible? yes, it’s possible in Amazon Web Services EC2 cloud hosting where you can expand your storage and computing space in the least AWS pricing. Similarly, you can increase and decrease your storage and computing service and you can Amazon EC2 to use the various virtual server
Now let’s see Amazon EC2 Features That Help You To Operate easily.
Amazon EC2 Features
There are lots of interesting and better user interface features available in Amazon EC2 that you will read below.
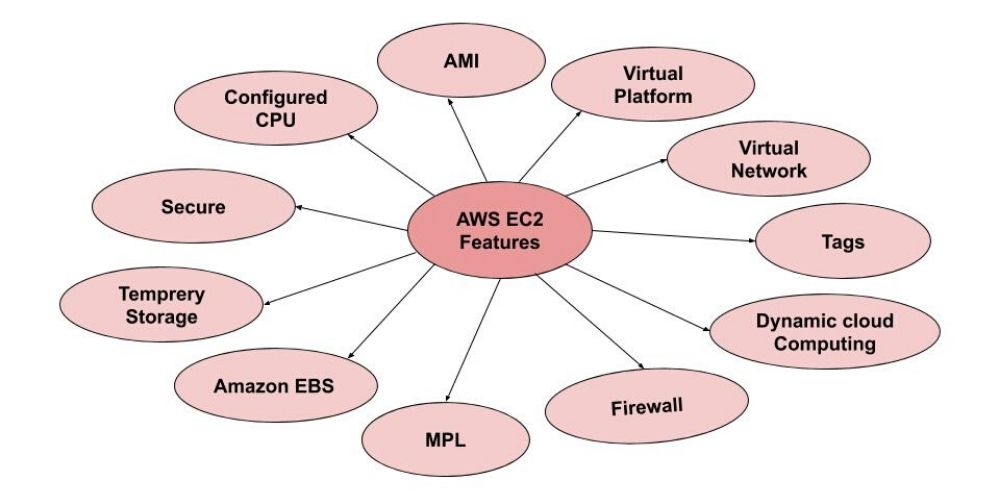
As you have seen features of Amazon EC2 in the above image. Now let’s discuss briefly all these features…
-
AMI(Amazon Machine Image):
AMI stores all the necessary information that is required to start an instance but you must specify an AMI while launching an instance. When This kind of instance is launched then AWS automatically creates an Amazon EBS volume from the associated AMI snapshot. And if you will change anything into AMI it will persist in the EBS volume.
-
Virtual Platform Or virtual Network:
AWS virtual computing is beneficial in today’s time. Virtual computing means a remote computer that you can access from anywhere with the help of your personal computer. Like if you are at the house and you want to do an office job.
You will then connect your PC to your remote office computer over the Internet. You can then remotely operate your office server on your local machine. And you’ll be able to work with input devices like the mouse and keyboard. -
Tags:
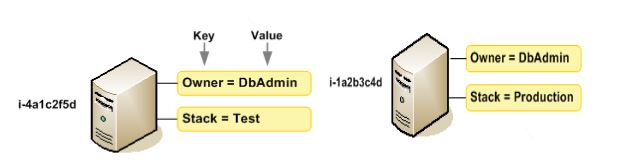
Tags are nothing, it is just you can assign a synonym to your Amazon instance and images and other EC2 resources. But remember that you should not assign sensitive data to tags. It’s beneficial when you have many resources of the same type. See below images to better understand…
-
Dynamic Cloud Computing In AWS
Means Aws EC2 provides several services like virtualization, service-management, asset management, and information management and several more service which we called a collection of data centers. Which provides a static IPV4 location for your instance.
-
Firewall:
A firewall is a security system for incoming and outgoing traffic into your network. Basically, the firewall is a predefined set of rules and regulations between trusted internet and an untrusted external network. Whom we called the Internet.
MPL(Multiple Physical Location) or Amazon EBS volume: This means you have multiple physical data storage volumes available in Amazon Elastic Block Store(EBS) volume. -
Temporary Storage:
A storage volume for interim data that you keep or terminate your instance, identified as a storage volume.
-
Secure:
Best security provider and fully self-manageable hosting. So that you can secure your virtual machine and data on the server. And the other benefit is amazon storing your instance login information as a public key while you have a private key in a secure place.
-
Configured CPU:
It provides many configurations of CPU as if you want to extend your storage or increase or decrease your networking capacity for your instance.
Suggest: You can also read Binary tree in data structure.
How To Start With Amazon Web Service EC2: Host Your Website Free
When we want to start Amazon EC2, we have to set up Amazon Ec2 to use it. And when you will complete your EC2 setup than you can host your WordPress website on Amazon lets see how to setup EC2.
Let’s understand step by step
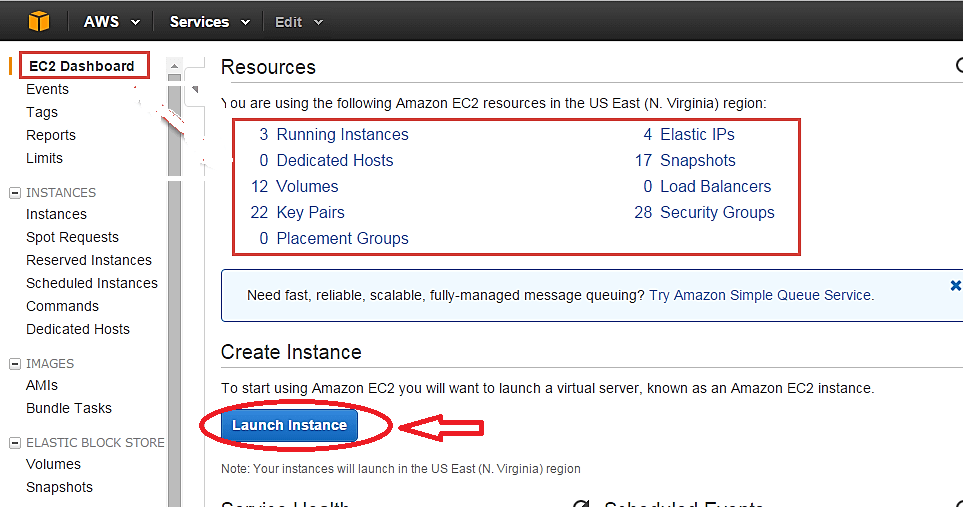
- To starting EC2, first, you need to sign up for AWS services. But if you already signup then you can directly start your instance using the AWS free tier. Then choose your location when you select a location, Your virtual private service is open in that location. After that you will see all the Aws services then you have to select ec2 among them for launching your private server. As you select on ec2, the next window will appear that will show you all the instance running information.

- Just below of resources, you will find a launch instance button which is in blue. Then next window appears for choosing Amazon Machine Image(AMI). Here you will see different operating systems you can choose according to your needs. But we are choosing the ubuntu server with the help of a select button. After that the next window will appear to choose an instance type, you have to do nothing here.
- Now you have to Just click here the “next configuration instance details” button. Suddenly you will see the next configuration instance details window where you can see all the details of the instance.
Now you have to choose several servers in the dropdown select1. Then select the next click on the add storage button below.
Suggest: You can also read Binary search
-
How To Add Storage
Then you will see the Add storage window where you have to specify size. select 30 GB as amazon provides a maximum of 30gb free web services. Then click on the next to add the tag button After that you need to click on the add tag button. Now you specify your instance key name then click on the next configuration security group. Then add a rule like TCP, All UDP, RDP then HTTP and Https you have to specify all of these.
- Then go to the resource column and select anywhere in all the fields. then simply click on the review and launch button. Now just once again you can check your instance details then select the launch button. Now you will see a popup window for select security key pairs where you have to select “create a new key pair” then specify key pair name and click on download key button. When downloading will be completed, you will need to click on the launch instance.
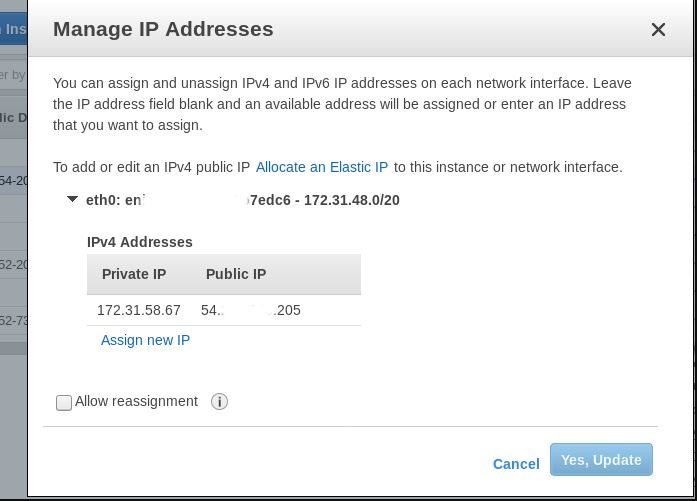
- It will take around 20 minutes to launch your instance according to your internet connection. And when your server successfully launched then you will see below your default IP address which is public. But hosting in public IP is not safe so you have to generate a private IP address for security purposes. To creating a private IP address, just see the left side menu bar and select Elastic IPs.
How to create a private IP address
- As you click on it you will see Allocate new address button click on it. Then click on allocate and then close button. Finally, you will see a private IP address now you have to select the action button then associate the action button you will see a window named associate address. where you have to select your server from instance dropdown menu. After that select private IP by drop-down then click on the associate button Now you are ready to use your server.
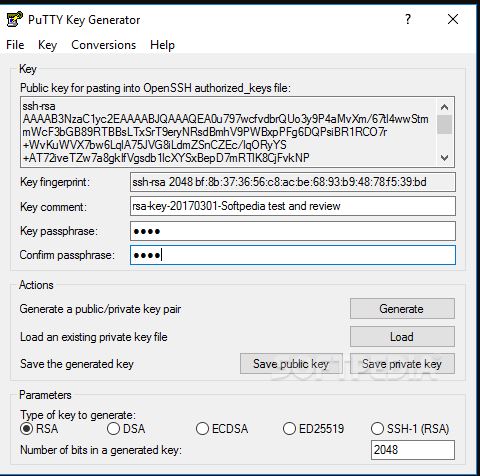
- Now you have to configure your server with the help of putty application and Puttygen application. First of all, you have to open Putty when it will open then you have to click on the load button and select downloaded private key. Then click on save private key and allocate save path for it and give the name and click on the Save button.
- Now you have to start the Putty application. after open putty you have to go AWS dashboard, then select running instance then select the connect button. As you click on it popup window will appear with the information. Here you will have to copy the address and now go to the Putty window. Then paste that address into the field of “Hostname and IP address” . after that specify port no 22.
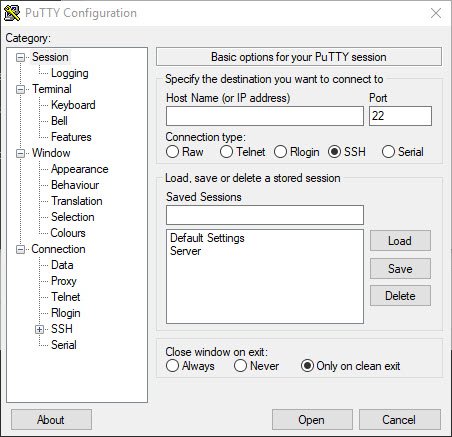
- Now you have to go SSh then click on Auth. Now you have to choose your downloaded private key with the help of the browse button and open it. Then again back to the session and hit the open button. Then the popup window will open where you have to select the yes button Now you can log in to your server.
What is the cost and price of Amazon EC2
You can use EC2 as free for 1 month after that you can pay for your instance with five different ways either On-Demand or Savings Plans, Reserved Instances, and Spot Instances. Besides these, you can pay with the help of a Dedicated host which is given by AWS ec2!
Free Access of EC2
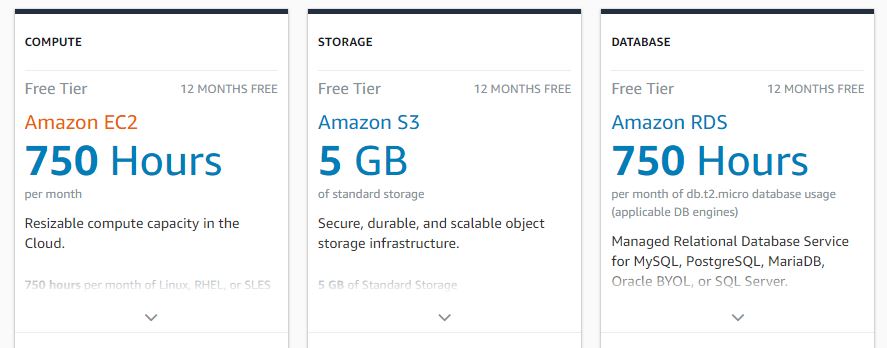
You can use Ec2 free but only 750 hrs every month. To continue using free instance you have to use always Micro-Instance.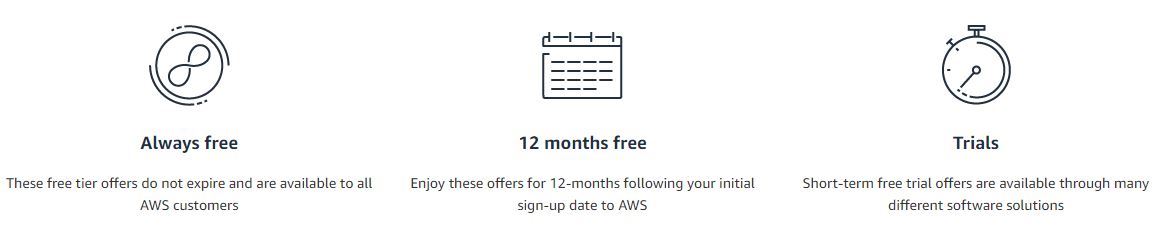 What will you get in Free Tier
You will get some limited hours and storage capacity and RDBMS.
This information has been taken from the Amazon cloud hosting
Summary
Finally, you have seen lots of benefits of amazon EC2 and how you will use and manage your instance. Similarly, you have seen how can we freely host our website on amazon ec2. It’s awesome for beginner and testing purposes because amazon provides free access to EC2. Additionally, Amazon supports different payment options so that you don’t have to worry about it.